使用fastdfs上传视频并使用FFmpegFrameGrabberFrameGrabber在上传视频时截图作为封面 最近为了参加一个比赛,需要一个视频上传功能,所以查了很多。以下为一个小demo
使用工具:idea,阿里云服务器,fastdfs
服务器部分
在阿里云服务器上安装fastdfs分布式文件管理系统https://www.cnblogs.com/handsomeye/p/9451568.html
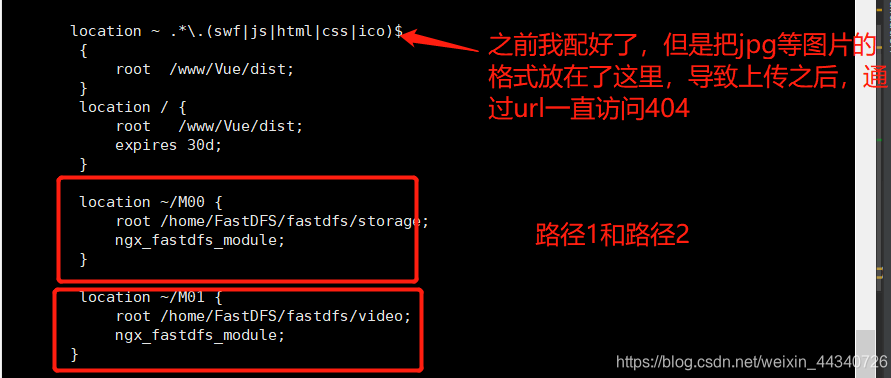
安装fastdfs踩过太多坑了,安装一定要注意,storage.conf,client.conf,tracker.conf这三个配置文件的路径设置什么的,然后要搭配nginx实现访问,nginx的配置文件nginx.conf也要注意
后端部分 fastdfs和nginx配置并测试好了之后,开始写测试代码
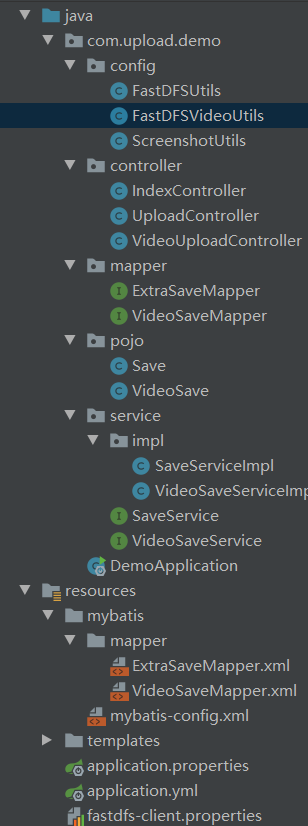
1.idea文件结构如图
2.在idea新建springboot项目,导入相关依赖 1 2 3 4 5 6 7 8 9 10 11 12 13 14 15 16 17 18 19 20 21 22 23 24 25 26 27 28 29 30 31 32 33 34 35 36 37 38 39 40 41 42 43 44 45 46 47 48 49 50 51 52 53 54 55 56 57 58 59 60 61 62 63 64 65 66 67 68 69 70 71 <dependencies> <dependency> <groupId>org.springframework.boot</groupId> <artifactId>spring-boot-starter</artifactId> </dependency> <dependency> <groupId>org.springframework.boot</groupId> <artifactId>spring-boot-starter-test</artifactId> <scope>test</scope> <exclusions> <exclusion> <groupId>org.junit.vintage</groupId> <artifactId>junit-vintage-engine</artifactId> </exclusion> </exclusions> </dependency> <dependency> <groupId>org.springframework.boot</groupId> <artifactId>spring-boot-starter-web</artifactId> </dependency> <dependency> <groupId>org.springframework.boot</groupId> <artifactId>spring-boot-starter-thymeleaf</artifactId> </dependency> <!--fastdfs依赖--> <dependency> <groupId>net.oschina.zcx7878</groupId> <artifactId>fastdfs-client-java</artifactId> <version>1.27.0.0</version> </dependency> <dependency> <groupId>org.mybatis.spring.boot</groupId> <artifactId>mybatis-spring-boot-starter</artifactId> <version>2.1.1</version> </dependency> <dependency> <groupId>mysql</groupId> <artifactId>mysql-connector-java</artifactId> <scope>runtime</scope> </dependency> <dependency> <groupId>org.springframework.boot</groupId> <artifactId>spring-boot-starter-data-jdbc</artifactId> </dependency> <dependency> <groupId>org.projectlombok</groupId> <artifactId>lombok</artifactId> <scope>provided</scope> </dependency> <!-- 上传视频截图依赖--> <dependency> <groupId>org.bytedeco</groupId> <artifactId>javacv</artifactId> <version>0.8</version> </dependency> <!--file转化为MultipartFile file的依赖--> <dependency> <groupId>org.apache.httpcomponents</groupId> <artifactId>httpcore</artifactId> <version>4.4.9</version> </dependency> <dependency> <groupId>org.springframework</groupId> <artifactId>spring-test</artifactId> <version>5.1.6.RELEASE</version> </dependency> </dependencies>
3.往resources中添加一个fastdfs的配置文件fastdfs-client.properties 1 2 3 4 5 6 7 8 9 10 11 12 13 14 15 16 17 18 19 20 21 22 23 24 25 26 ## fastdfs-client.properties fastdfs.connect_timeout_in_seconds = 5 fastdfs.network_timeout_in_seconds = 30 fastdfs.charset = UTF-8 fastdfs.http_anti_steal_token = false fastdfs.http_secret_key = FastDFS1234567890 fastdfs.http_tracker_http_port = 80 #你服务器的地址 fastdfs.tracker_servers = xx.xx.xx.xx:22122 ## Whether to open the connection pool, if not, create a new connection every time fastdfs.connection_pool.enabled = true ## max_count_per_entry: max connection count per host:port , 0 is not limit fastdfs.connection_pool.max_count_per_entry = 500 ## connections whose the idle time exceeds this time will be closed, unit: second, default value is 3600 fastdfs.connection_pool.max_idle_time = 3600 ## Maximum waiting time when the maximum number of connections is reached, unit: millisecond, default value is 1000 fastdfs.connection_pool.max_wait_time_in_ms = 1000
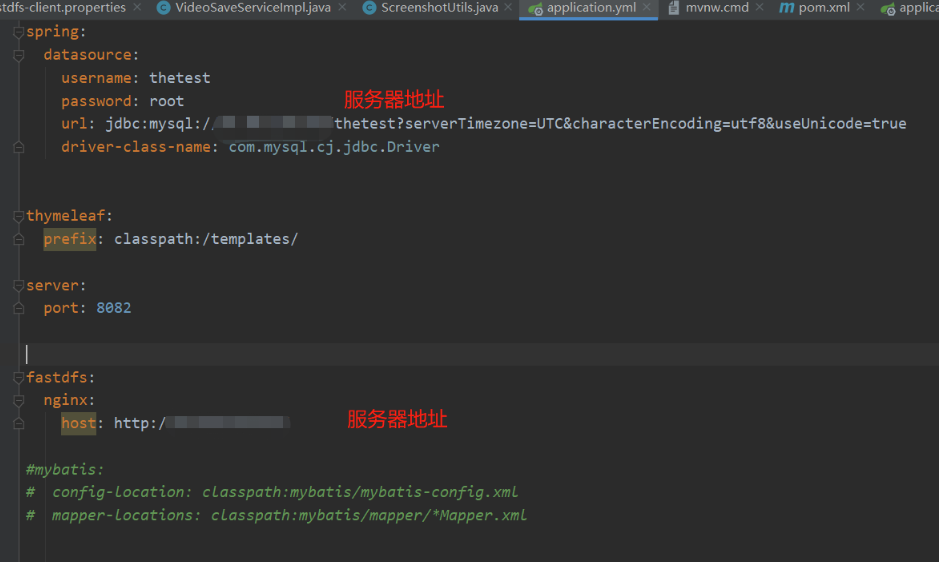
4.application.yml
5.编写FastDFSVideoUtils工具类 1 2 3 4 5 6 7 8 9 10 11 12 13 14 15 16 17 18 19 20 21 22 23 24 25 26 27 28 29 30 31 32 33 34 35 36 37 38 39 40 41 42 43 44 import org.csource.common.MyException; import org.csource.fastdfs.*; import org.springframework.web.multipart.MultipartFile; import java.io.IOException; public class FastDFSVideoUtils { private static StorageClient1 client1; private static StorageServer storeStorage; private static StorageServer storageServer; static{ try { ClientGlobal.initByProperties("fastdfs-client.properties"); TrackerClient trackerClient = new TrackerClient(); TrackerServer trackerServer = trackerClient.getConnection(); storeStorage = trackerClient.getStoreStorage(trackerServer); String storageIp = storeStorage.getSocket().getInetAddress().getHostAddress(); Integer port = storeStorage.getSocket().getPort(); //0表示上传到图片目录,1表示上传到视频目录 storageServer = new StorageServer(storageIp, port, 1); client1 = new StorageClient1(trackerServer, storageServer); } catch (IOException e) { e.printStackTrace(); } catch (MyException e) { e.printStackTrace(); } } public static String upload(MultipartFile file){ String oldName = file.getOriginalFilename(); try { return client1.upload_file1(file.getBytes(), oldName.substring(oldName.lastIndexOf(".")+1),null); } catch (IOException e) { e.printStackTrace(); } catch (MyException e) { e.printStackTrace(); } return null; } }
还有截图工具类:
1 2 3 4 5 6 7 8 9 10 11 12 13 14 15 16 17 18 19 20 21 22 23 24 25 26 27 28 29 30 31 32 33 34 35 36 37 38 39 40 41 42 43 44 45 46 47 48 49 50 51 52 53 54 55 56 57 58 59 60 61 62 63 64 65 66 67 68 69 70 71 72 73 74 75 import java.awt.Image; import java.awt.image.BufferedImage; import java.io.File; import java.util.UUID; import javax.imageio.ImageIO; import org.bytedeco.javacpp.opencv_core.IplImage; import org.bytedeco.javacv.FFmpegFrameGrabber; import org.bytedeco.javacv.Frame; import org.springframework.web.multipart.MultipartFile; public class ScreenshotUtils { /** * 获取指定视频的帧并保存为图片至指定目录 * @param videourl 源视频文件路径 * @throws Exception */ public static String fetchFrame(String videourl,MultipartFile file) throws Exception { //获取当前系统时间,类似new Date(),效率比较好 long start = System.currentTimeMillis(); //储存截图的文件 //window下用\\,电脑要有D盘,不然换成你想要的盘 File targetFile = new File("D:\\video\\cutpic"); if(!targetFile.exists()){ targetFile.mkdirs(); } String filename = file.getOriginalFilename(); String filenamePrefix = filename.substring(0, filename.lastIndexOf(".")); //创建储存截图的图片文件路径 //window下用\\ String coverimgPath = targetFile.getPath()+ "\\" + UUID.randomUUID().toString()+filenamePrefix + ".jpg"; File cutpic = new File(coverimgPath); //FFmpegFrameGrabb读取时间随机截图类 FFmpegFrameGrabber ff = new FFmpegFrameGrabber(videourl); ff.start(); // 表示视频的总图片数量 int lenght = ff.getLengthInFrames(); int i = 0; Frame f = null; while (i < lenght) { // 过滤前5帧,避免出现全黑的图片,依自己情况而定 f = ff.grabFrame(); if ((i > 5) && (f.image != null)) { break; } i++; } IplImage img = f.image; int owidth = img.width(); int oheight = img.height(); // 对截取的帧进行等比例缩放 int width = 800; int height = (int) (((double) width / owidth) * oheight); BufferedImage bi = new BufferedImage(width, height, BufferedImage.TYPE_3BYTE_BGR); bi.getGraphics().drawImage(f.image.getBufferedImage().getScaledInstance(width, height, Image.SCALE_SMOOTH), 0, 0, null); ImageIO.write(bi, "jpg", cutpic); //ff.flush(); ff.stop(); System.out.println(System.currentTimeMillis() - start); return coverimgPath; } }
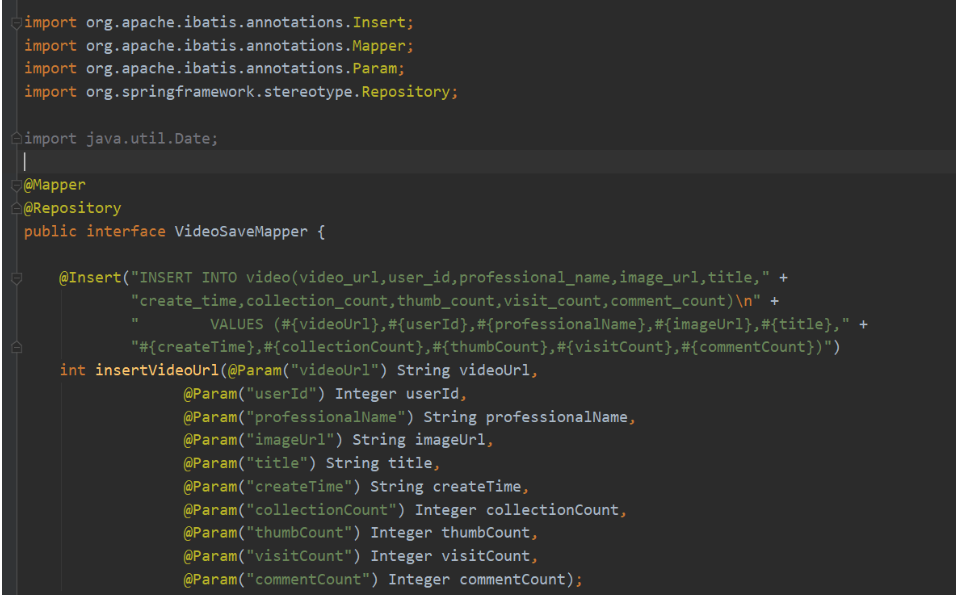
6.编写mapper文件和mapper.xml 这里因为我的mybatis-config.xml有问题,不知道什么错,所以先用注解方式测试,就可以不用xml文件了
1 2 3 4 5 6 7 8 9 10 <?xml version="1.0" encoding="UTF-8"?> <!DOCTYPE mapper PUBLIC "-//mybatis.org//DTD Mapper 3.0//EN" "http://mybatis.org/dtd/mybatis-3-mapper.dtd"> <mapper namespace="com.upload.demo.mapper.VideoSaveMapper"> <insert id="insertVideoUrl" > INSERT INTO video(video_url,user_id,professional_name,image_url,title,create_time,collection_count,thumb_count,visit_count,comment_count) VALUES (#{videoUrl},#{userId},#{professionalName},#{imageUrl},#{title},#{createTime},#{collectionCount},#{thumbCount},#{visitCount},#{commentCount}) </insert> </mapper>
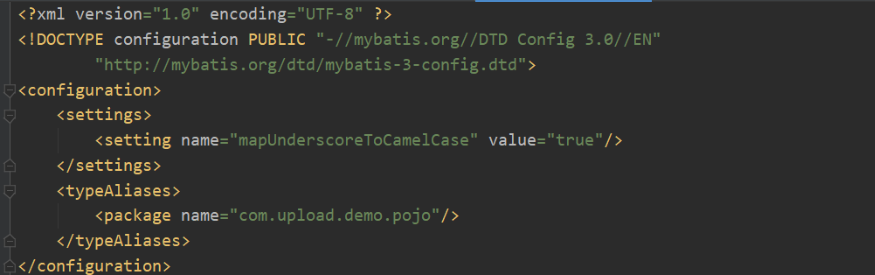
mybatis-config.xml
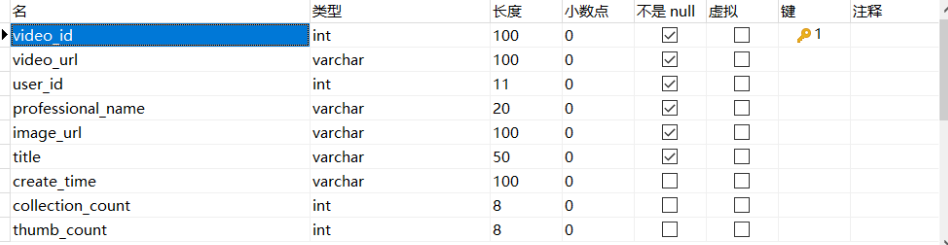
数据库我建在了服务器上,要先安装mysql服务在服务器上哦,结构如下,连接数据库的方法请自行百度
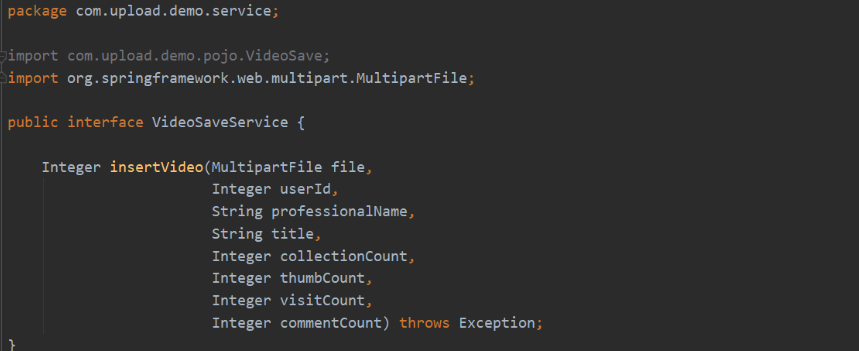
7.VideoSaveService和VideoSaveServiceImpl
1 2 3 4 5 6 7 8 9 10 11 12 13 14 15 16 17 18 19 20 21 22 23 24 25 26 27 28 29 30 31 32 33 34 35 36 37 38 39 40 41 42 43 44 45 46 47 48 49 50 51 52 53 54 55 56 57 58 59 60 61 62 import com.upload.demo.config.FastDFSUtils; import com.upload.demo.config.FastDFSVideoUtils; import com.upload.demo.config.ScreenshotUtils; import com.upload.demo.mapper.VideoSaveMapper; import com.upload.demo.pojo.VideoSave; import com.upload.demo.service.VideoSaveService; import org.apache.http.entity.ContentType; import org.springframework.beans.factory.annotation.Autowired; import org.springframework.beans.factory.annotation.Value; import org.springframework.mock.web.MockMultipartFile; import org.springframework.stereotype.Service; import org.springframework.web.bind.annotation.RequestParam; import org.springframework.web.multipart.MultipartFile; import java.io.File; import java.io.FileInputStream; import java.text.SimpleDateFormat; import java.util.Date; @Service public class VideoSaveServiceImpl implements VideoSaveService { private VideoSaveMapper videoSaveMapper; @Autowired VideoSaveServiceImpl(VideoSaveMapper videoSaveMapper){ this.videoSaveMapper = videoSaveMapper; } @Value("${fastdfs.nginx.host}") String nginxHost; @Override public Integer insertVideo(MultipartFile file, Integer userId, String professionalName, String title, Integer collectionCount, Integer thumbCount, Integer visitCount, Integer commentCount) throws Exception { final String fileId = FastDFSVideoUtils.upload(file); String videoUrl = nginxHost + fileId; Date date = new Date(); //HH为24小时制,hh为12小时制 SimpleDateFormat dateFormat= new SimpleDateFormat("yyyy-MM-dd :HH:mm:ss"); String createTime = dateFormat.format(date); //将截图转化为file对象,再将file对象转化为MockMultipartFile 对象 String cutpicPath = ScreenshotUtils.fetchFrame(videoUrl, file); File cutpic = new File(cutpicPath); FileInputStream fileInputStream = new FileInputStream(cutpic); MockMultipartFile cutPicFile = new MockMultipartFile(cutpic.getName(), cutpic.getName(), ContentType.APPLICATION_OCTET_STREAM.toString(), fileInputStream); //FastDFSUtils将上面转化的MockMultipartFile 对象上传 final String cutPicfileId = FastDFSVideoUtils.upload(cutPicFile); String imageUrl = nginxHost + cutPicfileId; return videoSaveMapper.insertVideoUrl(videoUrl,userId,professionalName,imageUrl,title,createTime,collectionCount,thumbCount,visitCount,commentCount); } }
8.VideoUploadController控制器代码 1 2 3 4 5 6 7 8 9 10 11 12 13 14 15 16 17 18 19 20 21 22 23 24 25 26 27 28 29 30 31 32 33 34 35 36 37 38 39 40 41 42 43 44 45 46 47 48 49 50 import com.upload.demo.config.FastDFSUtils; import com.upload.demo.config.FastDFSVideoUtils; import com.upload.demo.config.ScreenshotUtils; import com.upload.demo.service.VideoSaveService; import org.apache.http.entity.ContentType; import org.springframework.beans.factory.annotation.Autowired; import org.springframework.beans.factory.annotation.Value; import org.springframework.mock.web.MockMultipartFile; import org.springframework.stereotype.Controller; import org.springframework.web.bind.annotation.PostMapping; import org.springframework.web.bind.annotation.RequestParam; import org.springframework.web.multipart.MultipartFile; import java.io.File; import java.io.FileInputStream; @Controller public class VideoUploadController { @Value("${fastdfs.nginx.host}") String nginxHost; private VideoSaveService videoSaveService; @Autowired VideoUploadController(VideoSaveService videoSaveService){ this.videoSaveService = videoSaveService; } @PostMapping("/uploadVideo") public String UploadVideo(MultipartFile file, @RequestParam(value="userId",defaultValue="1") Integer userId, @RequestParam(value="professionalName",defaultValue="hhh") String professionalName, @RequestParam(value="title",defaultValue="123") String title, @RequestParam(value="collectionCount",defaultValue="0") Integer collectionCount, @RequestParam(value="thumbCount",defaultValue="0") Integer thumbCount, @RequestParam(value="visitCount",defaultValue="0") Integer visitCount, @RequestParam(value="commentCount",defaultValue="0") Integer commentCount ) throws Exception { if(videoSaveService.insertVideo(file,userId,professionalName,title,collectionCount,thumbCount,visitCount,commentCount)==1){ return "/success"; }else { return "/false"; } } }
前端部分 都要放在template文件夹下,控制器要有一个跳转到index.html下的方法,return就行,很简单。
1 2 3 4 5 6 7 8 9 10 11 12 13 14 15 16 17 18 19 20 21 <!DOCTYPE html> <html lang="en"> <head> <meta http-equiv="Content-type" content="text/html; charset=UTF-8"> <meta http-equiv="X-UA-Compatible" content="IE=edge,chrome=1"/> <title>单文件上传</title> </head> <body> <form method="post" action="/upload" enctype="multipart/form-data"> <input type="file" name="file"><br> <input type="submit" value="上传头像"> </form> <form method="post" action="/uploadVideo" enctype="multipart/form-data"> <input type="file" name="file"><br> <input type="submit" value="上传视频"> </form> </body> </html>
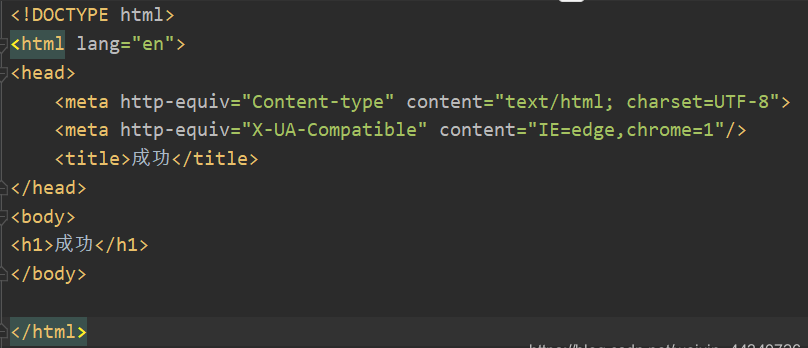
成功跳转到succes.html,失败跳转false.html
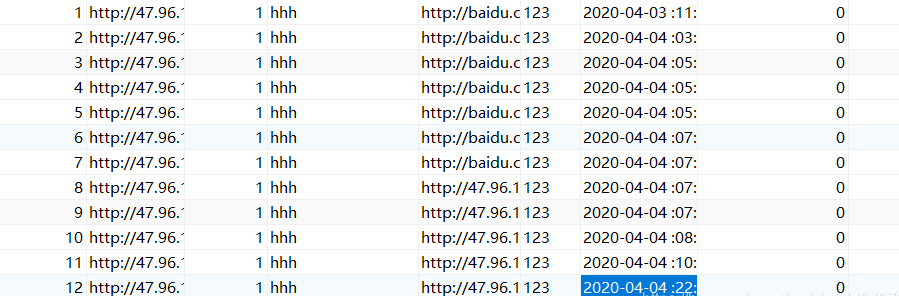
运行截图:
将url在浏览器打开
视频